Here are my questions:
1) Would you like to see Tutorial Tuesdays continue?
2) If you would like it to continue, how often do you think it should take place?
3) If you would like it to continue, what would you like to see offered as a tutorial?
4) Would you like to participate? (I could always make it a linky)
5) If you want to participate how often should we do it during the school year?
Thanks for all of the help. I will consider your feedback before making my final decision.
So now I bring you this week's Tutorial Tuesday. Yesterday I posted on my Monday Made It post my new bulletin boards that I got the idea from Going Nutty With Miss Squirrels. Today I am going to show you how I made mine.
Step one:
Gather the following supplies:
~insulation boards (found for around $10 at home improvement store)
~flat bed sheets (or fabric)
~scissors
~stapler (and staples)
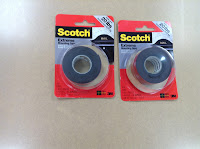
~Scotch 3M Extreme Mounting Tape (I recommend one roll per board; unlike my thinking of one roll per two boards)
Step two:
If you plan to make a smaller version you need to cut your insulation board to size. Do this by scoring it, folding it in half, and then scoring the other side. This will give you a pretty clean cut.
I cut one of mine in half; the rest remained full size.
Step three:
If you are using sheets you will need to rip the seam at the top of the sheet so that you have some extra length to work with. If you are using fabric make sure you get it long enough to cover the board (it is 4'x8', but needs extra length to wrap around the back.
This first picture shows the original seam and the second picture shows it after it has been ripped. I would recommend using a seam ripper. I did not have one at school so I used a push pin and scissors.
You will also need to cut it in half if you are doing a half size board.
Step four:
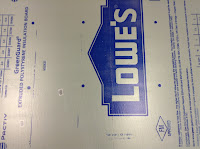
Lay the sheet (or fabric) flat on the ground and place the insulation on the sheet. Make sure that the printing is on the side that you can see. You do not want it against the fabric because it will show through.
Step five:
Staple the sheet/fabric to the back side of the insulation board. I recommend a lot of staples to insure the fabric stays as you pull from the other side. I do the shorter ends first and then the longer ends.
Step six:
Place strips of your mounting tape on the back. This is where I realized I did not buy enough mounting tape. I recommend that you make the strip cover more area on the board (mine still held, but I did later secure the top since it was leaning forward a little).
The red strips are the pieces of mounting tape.
Step seven:
Peel off the backing of the tape and carefully place on the wall. I was able to use the lines on my wall to try to place it as straight as possible. This would be much easier with another set of hands (my hubby was at work so I was on my own for this one)
Step eight:
I haven't completed this one yet so I don't have pictures, but it is to decorate. Add whatever you are putting on your boards and then you are finished!
Simple as that! I am loving my new boards and can't wait to decorate them!
Go get it now, while it's FREE!!!!
Enjoy!


I think Tutorial Tuesday is a great idea! I usually try to include my tutorial in my Monday Made It, but I always feel weird doing because they end up being the longest posts ever!!! I love your posters!!!
ReplyDeleteSarah
A Sunny Day in First Grade
I think Tutorial Tuesday is a WONDERFUL idea - It's so nice to see pinterest ideas or other ideas acted out so that other teachers can try them. I think if it is too overwhelming for you, open it as a linky - or ask for guest bloggers! I would be willing to write one up. I get to get back into my classroom in 2 weeks, and kids come back in 3 (I'm very upset I haven't been allowed in sooner!!) - and I have TONS of things I would love to do.
ReplyDelete